Saturday, April 10, 2010

A Formal Pizza Birthday Party

With being this new mommy, my time for completing things is minuscule. Thursday night my husband decided to change his birthday dinner from Saturday night to Friday night. Which cut my preparation time in half.

I didn't have much time to decorate and no money to do so either. Here is how it turned out.


Photobucket

Photobucket

Photobucket

Photobucket

Photobucket

Photobucket

Photobucket


Thursday, April 1, 2010

My little bundle of Joy has arrived!

I know I haven't been posting lately, but I am now a proud new mommy! My little Chloe was born March 18th at 9:45am. She was born a healthy 7 pound and 19 inches long.


Photobucket


Photobucket


Photobucket


Photobucket


Wednesday, March 10, 2010

Chloe's Nursery half way done

Our little angel is suppose to grace us with her presence any day day (I am due March 20th). We are so very close to having her room completed. Here is what we have done so far.

I have actually made almost everything in this room and if not we scored a huge deal on the item. In my first blog post I explained how my husband and I are huge cheap skates, and here is what we have so far from being cheap skates. This room has only cost us $212 so far and should only take about $100 left to complete.

Photobucket


Photobucket


Photobucket
Some of the drawers are missing because my husband is painting them out side right now.

Photobucket


Photobucket


Photobucket

The nursery baby mobile I made has not been hung up yet, so you will just have to use your imagination and not picture my hand holding it up.

Photobucket


Head Band for a momma

I am running out of craft materials. I can't wait till my hubby gets paid so I can start more crafts. We also have not been able to get my hair done in a long time and probably won't be able to afford for a while longer, so decided to make a few headbands for myself.

Photobucket


It sure has been hard feeling pretty when you are 38 weeks and 5 days pregnant and about to Pop any day now. These head bands are helping out a little, making me feel a little more me.

Photobucket


Photobucket


MAKE SURE YOU ARE PREPARED TO SEE MY BIG BABY BELLY!!! BRACE YOURSELF BEFORE SCROLLING DOWN!!!!

Photobucket

Photobucket

Tuesday, March 9, 2010

Blog Shout Out!

I have to give a shout out to my favorite blogger of the moment! Smile and Wave is an amazing inspiration and kind of reminds me, of well Me!

She is a stay at home crafty mom, as am I (I will be a mommy any day now), and her style is much like mine. She gets her inspiration from places like Urban Outfitters and Anthropologie as do I. It's kind of funny. I think I have found my twin.


Photobucket

Sunday, March 7, 2010

Crafty and Crazy during Nesting Time

I believe that I may be nesting. I am due with my baby in just a few short weeks (March 20th) and I feel like the energizer bunny has hit me upside the head with a battery or something along that effect. Yesterday I went craft crazy, sewing projects for over 8 hours. Here are some of the projects I made.

Photobucket

I love the Ruffle pillow I made to match Little Chloe's Crib Sheet I made.

Here is the cutest little rabbit! I love how it turned out!

Photobucket


I also Decided to make my own Nursing Cover that was a little different, with my own little flair. I am very happy with how cute and pretty this turned out.

Photobucket

PhotobucketPhotobucket

I also made a few more burp clothes to match the nursing cover.


Photobucket

I used this awesome fabric!

Photobucket

I also made this adorable stuffed Owl, since Chloe's (my almost born baby) nursery is owl/nature themed. This is my husbands favorite project I made today.

Photobucket

Photobucket

I do declare that I have fallen in love with making fabric flowers! They are so easy and turn out so freaking cute! Here is the first one I made and turned into a cute headband. I am 9 and half months pregnant...Better pictures of me to come in the following months.

Photobucket


I made all of this yesterday. I think you can now understand why I feel like I am on craft crack. For the past couple of days, I have had this extremely high energy and feeling of needing to have everything completed and put away. My husband thinks its funny, because I have been running circles around him all weekend and usually I am dragging myself around.

I have made many more things, but can not post them just yet. They are gifts that will be given out and those receiving them read my blog.

I will be back soon with more crafts completed.


Wednesday, March 3, 2010

Chloe's Owl Crib Quilt


Chloe's Baby Crib Quilt

This is the third quilt I have ever made and I am very pleased with how it has turned out. I still have the hand stitching to complete, but that will hopefully take me less than 12 days. I would like to get one owl stitched everyday until completed.


Photobucket

Photobucket

Photobucket


Photobucket

Photobucket

Photobucket


Sunday, February 28, 2010

Owl and Bird DIY Nursery Mobile


Photobucket


I looked and looked for a baby mobile I would love for the room and found that most are ugly or way to expensive, so here is my attempt and making one myself.

All I did was find a free PDF template of an owl and a bird and turn that into a stuffed animal and then I did a blanket stitch over the edge of each animal to give it a better look. I then hung them from a Quilters hoop. I did add some ribbon in between each animal to just hang there creating a whimsical look. I did add 3 more pieces of ribbon to create the part that will hang from the ceiling. I wasn't sure how it would turn out, but fell in love with the end result.

I am just so excited that the room is close to completion and can't wait to post pictures of how it turned out.


Photobucket


Friday, February 26, 2010

Owl theme Crib Quilt *The Beginning


Photobucket

I am working on the Crib quilt right now. I still have some more to complete, but here is what it looks like pieced together. I have never worked with applique, so this is fun for me. In fact, this is only the 3d quilt I have ever made. I always get nervous with quilts because I don't want to screw it up. I have a fear of failing a quilt silly I know. My mother was a great quilter. I would have sleepovers while our mom would pull an all nighter and come up with this awesome quilt. There cuts were perfect, their stitches amazing and straight and the whole quilt look like it should be in an art museum. Since I can remember I remember my mom behind a sewing machine, or on the couch hand stitching a huge quilt.

Uh Oh, an "I remember" story...
I remember one day I decided that I wanted to surprise my mom and sew my dolly a new dress, so I hid in my room and started my project. I carefully started to cut out two pieces of fabric in the shape of a dress and then BOOM there was blood everywhere. I accidentally cut the tip of my index finger off. I was so scared because I had never seen so much blood before. I tried to make it stop by holding anything to it, but what ever I held there, blood would be seeping from it moments later. Moments later I had to get my mom. Thank goodness we had a retired nurse as a neighbor and she help out.

Well it seems I am having lots of memories today. I am beginning to sound old, when in fact I am just 23. Not even 23 yet. My birthday is tomorrow. I am an almost 23 year old with a 37 weeks pregnant belly remembering the simpler time and wishing I would get off my ass and finish my babies quilt.


Photobucket


Wednesday, February 24, 2010

DIY Lamp Shade Cover


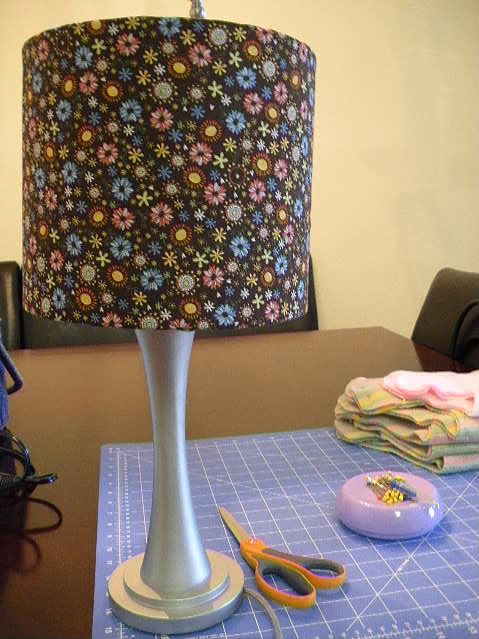
I was given this lamp to use in the nursery, however I hated the color. I am a big believer in reusing items, so I decided to use some coordinating fabric to reuse this lamp.

Photobucket
Here is how it turned out.

Photobucket


If you want to do it yourself. I have included my own little tutorial below.

What you will need:
1/2 yard of fabric (any cotton will do)
Gorilla Glue
A ruler
Some Scrap Paper

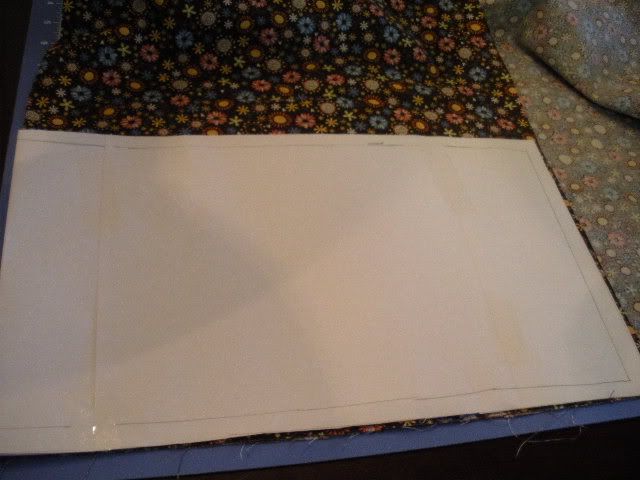
1.Tape together some paper. Make sure that it will fit all the way around the lamp. At first I had 3 peices of paper and then realized I would need 4 pieces taped together.

Photobucket

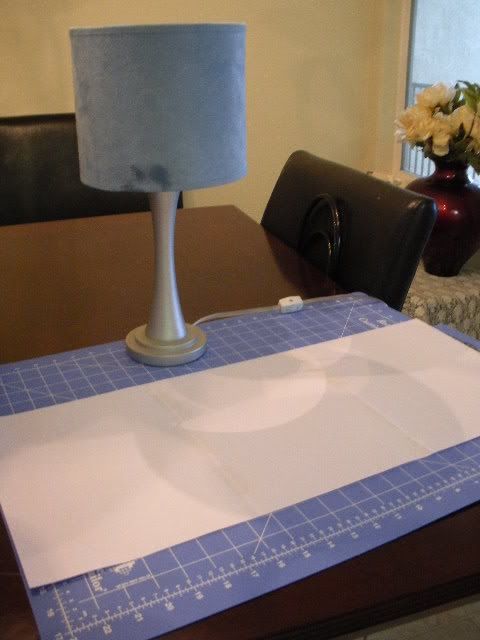
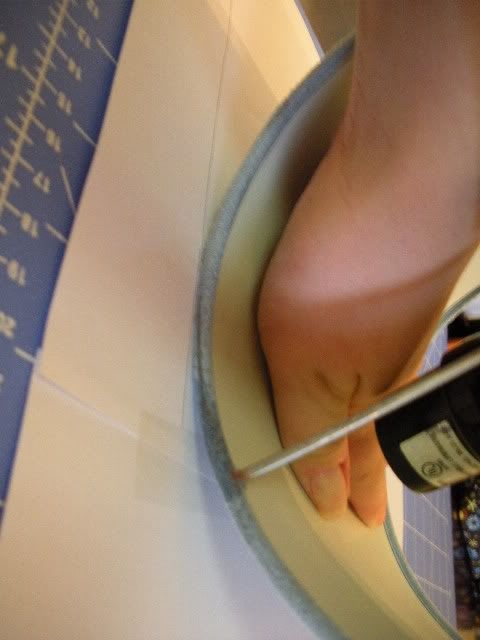
2. Find the start point and mark the lamp and paper. Slowly roll the lamp over the paper and trace the edge. Do not cut out yet!

Photobucket

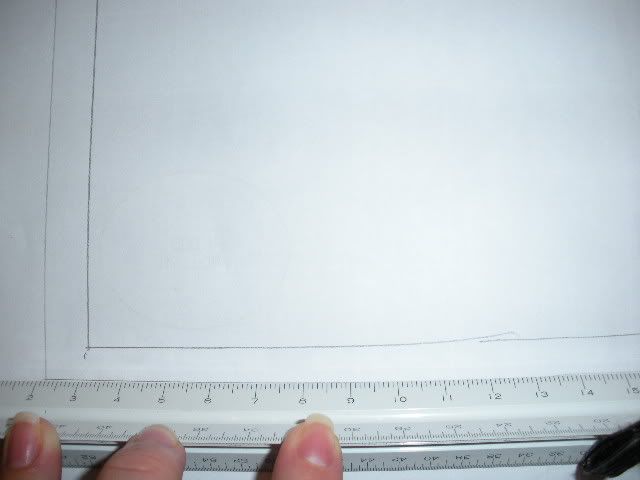
3. Add an extra 1/2"in. to the pattern. This is so you can fold over and glue later on. It will look like this.

Photobucket

4. Cut out the pattern you just created and fold in half. Fold fabric to create a fold and line folded fabric along the folded end of your pattern. Pin and cut out your fabric.

Photobucket>

5. Use Gorilla Glue to glue one end of the fabric to the lamp shade.
Photobucket


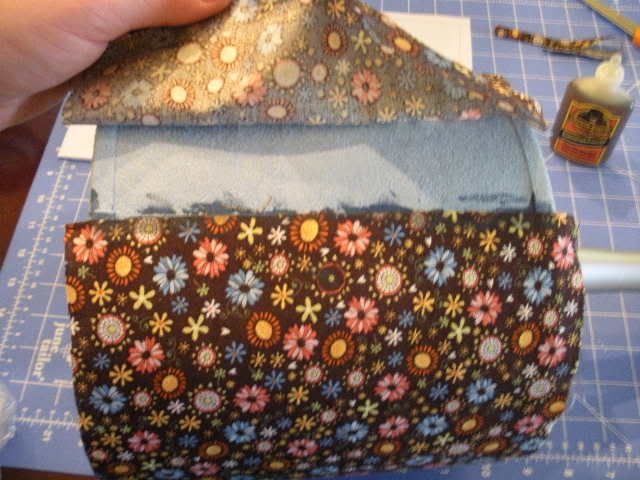
6. On the other end of the fabric glue a fold. Like shown.

Photobucket

7. Precede to glue the remaining fabric end to the other of the lamp. Pull to make sure there are no wrinkles or kinks.

Photobucket

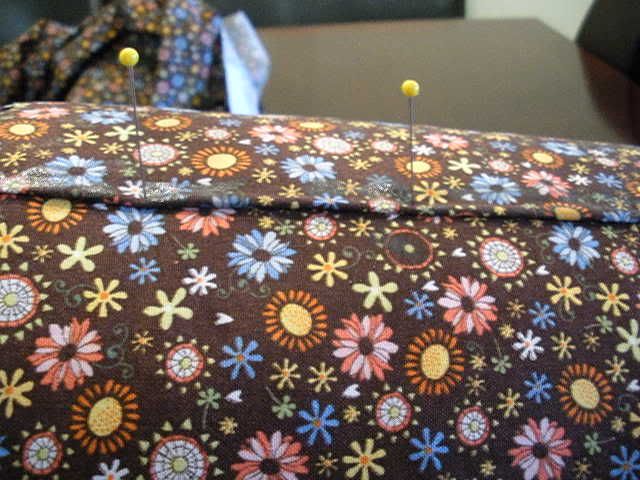
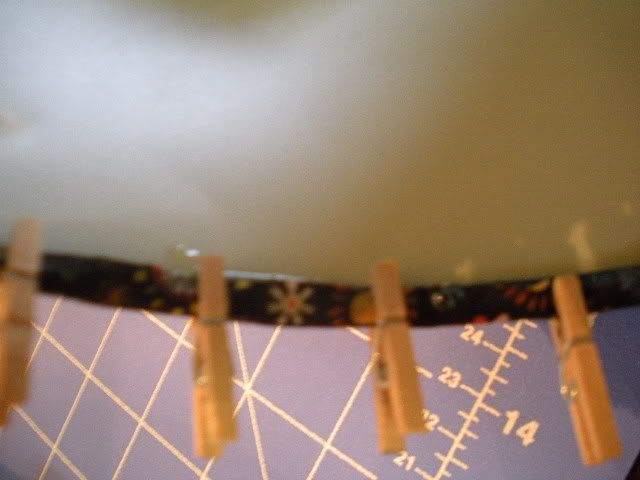
8. Pin to keep in place.

Photobucket

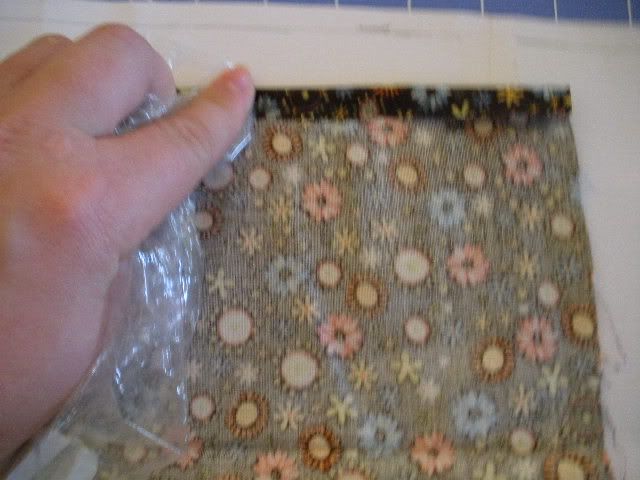
9. Precede to one end of the lamp and start to glue the interior with the remaining fabric edge. Clamp shut to let dry.

Photobucket

10. Complete both sides and let dry.

Photobucket

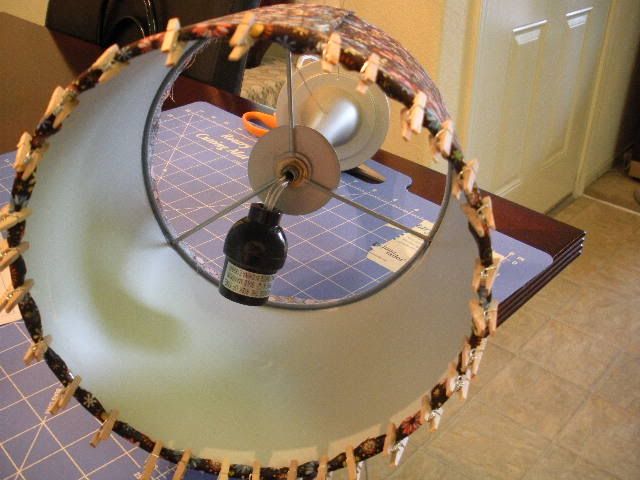
11. Unclamp and enjoy your new lamp cover!

Photobucket